First Potting of the BIG Yew into a training pot + Video

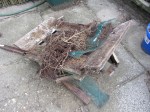
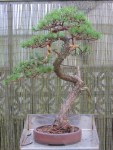
Three years is a long time to find out if your collected tree has made enough root in the right place to enable you to pot the tree into a training pot. I had reached the stage where the BIG yew was ready, would there be enough root, would it fit into the BIG pot I had prepared, could I make this big heavy tree stable and secure?

My good friend David Barlow was there to help me. David is a superb engineer and this tree would require some clever sub soil engineering to make it stable.
Cutting the roots
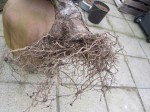
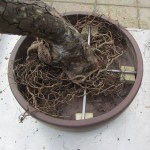
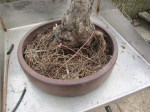
The tree was suspended between two plant pots so that I could work to remove the plastic pots easily. David held the tree and I set to work. I was very pleased with the amount of new root the tree had made.

When the tree was collected very little root was on the tree, careful maintenance and a strict regime of misting, feeding, placement had brought the tree on well… I was happy to start the work.
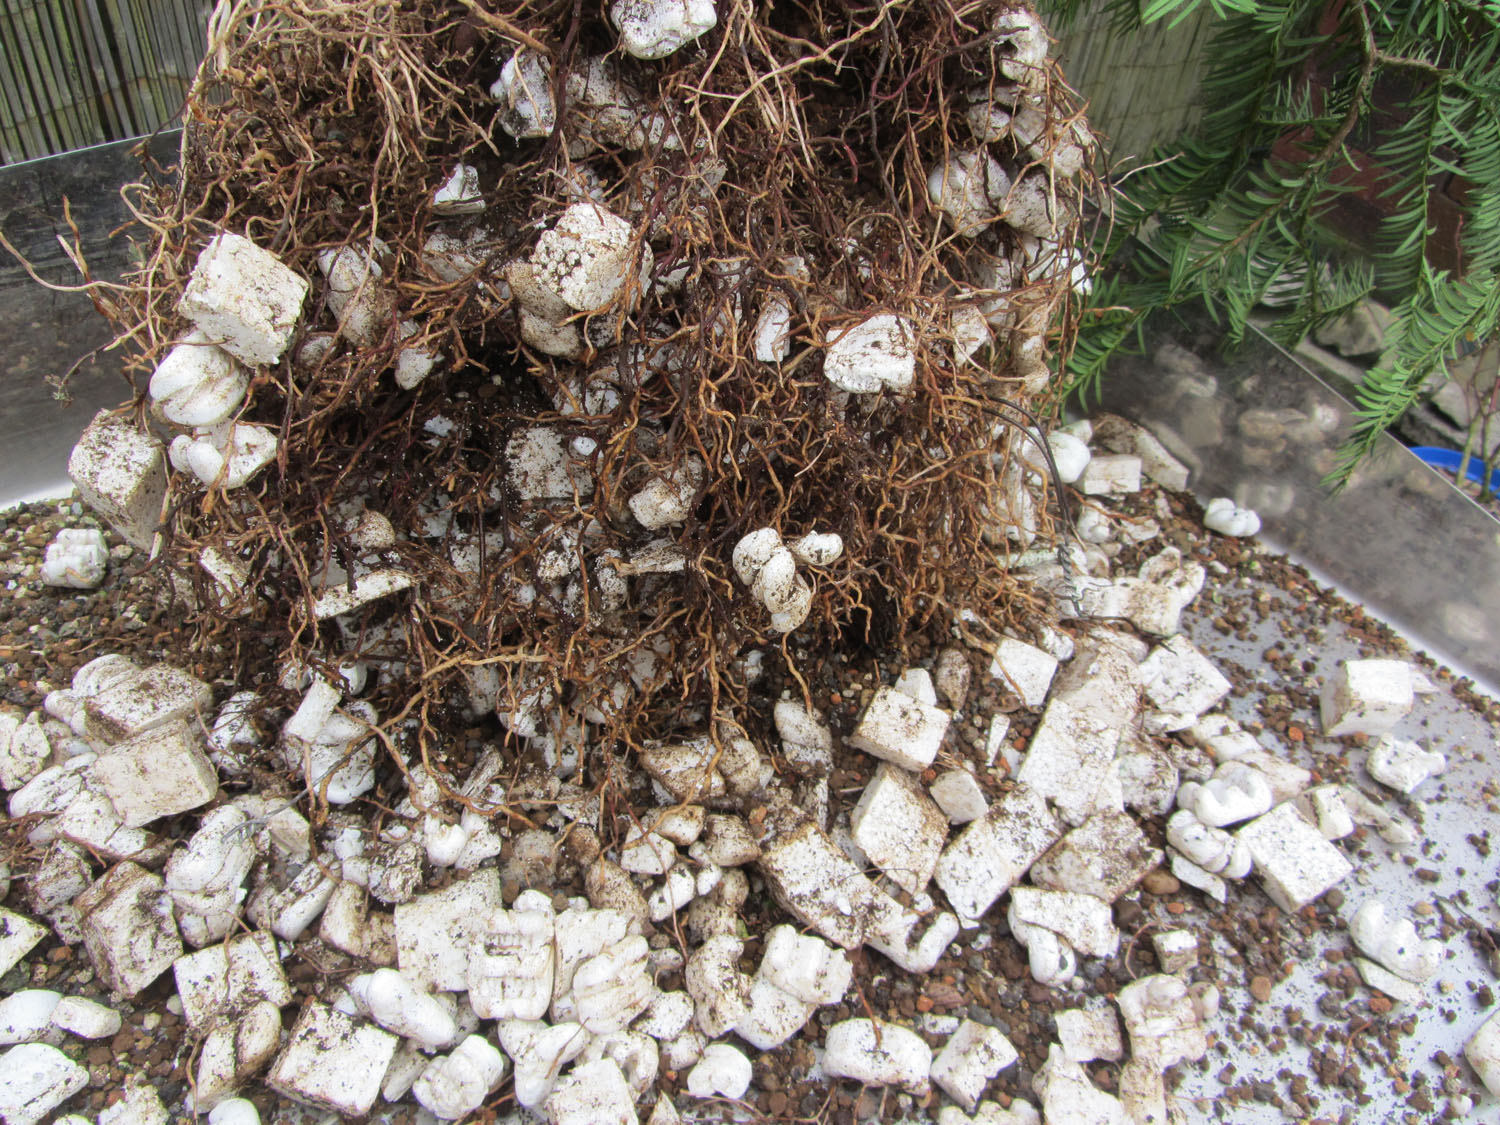
The Yew had been planted in a VERY open soil mix of Acadama, Grit and pumice and a small amount of orchid bark. This ensured good drainage and an easy media for root growth.
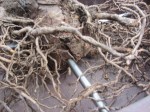
Once the old plastic pots had been cut away the roots could be inspected closely, I decided to cut away eight inches of root so that the tree would sit well in the pot. I was aware of the old deep root from the time that the tree was collected (photograph EVERYTHING) had I not removed this the tree would have not have looked stable in the pot.
I would have liked to have had the deadwood at the base of the tree overhanging the pot, BUT when the tree was positioned in the pot it simply did not work, it had to be removed!
The Blocks wirted in

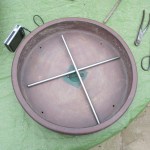
Two hardwood blocks were employed to stabilize the tree, they were fixed in place with copper wire. The base of the tree was drilled and 4mm Copper used to tie in the tree through the holes in the base of the pot.
I used large size pure Acadama in the potting as this had proved very successful on previous potting of large Yew in my garden. Once the soil was filled to the rim of the pot the drama created by the base of the tree could be enjoyed. This was important as the visual weight of tree required a strong base to sustain the appearance of a massive tree.
The first styling of the tree with the basic branch structure put in place was in November, this potting was two months ago and the tree has responded well. I guess it will be AT LEAST ten years before this tree is ready for showing… BUT it will be worth it.

Stainless steel rods secure large Scots pine in the Duffett Pot

David Barlows Pine

After 10 years of establishing from the wild and two stylings David’s Scots Pine is now ready for a final potting. I found a beautiful ‘vintage’ deep red unglazed Gordon Duffett pot perfect for the tree.

Terry Foster did both stylings for the tree, the first to position the key branches, and six years later at the Burrs event in November 2012 for the second to refine.

When the tree was collected it had NO large roots. Only a few fine feeder roots, David masterfully established the tree in a very open mixture of Acadama, Alpine grit and Perlite. The tree was secured to the box with guy wires to ensure that it would not ‘rock’ and remain firm, any movement inhibit the root growth. The problem with having no LARGE roots meant that the tree could not be tied into the pot, having guy wires was out of the question so a solution was needed.

05 Stainless steel rods and PotDavid is a precision engineer with his own extensive workshop so when I requested two stainless steel rods cut to length and the ends tapered, he delivered these in less than 10 minutes. Two holes were drilled into the base of the tree under the new roots that had grown; the rods were inserted tightly into the holes in the form a ‘cross’. They were then stabilised with hardwood blocks and a layer of soil mix was added, the tree wired down onto the blocks and the whole process ensured that the tree was solid in the pot. The reason for using the wooden block was so that we could angle the position the tree exactly, each block was cut to size. More soil was added and worked into all the cavities with a chop stick.

These stainless steel rods will stay in the tree forever and become part of the root mass, they will never rust or snap. The heavy wire used to secure the tree was necessary for this final potting. After a few years when the root mass has started to solidify and the tree exhibited these wire can be cut and removed.

Using Polystyrene chips when repotting

In the second potting of collected material I sometimes use Polystyrene chips in the bottom of the growing on pot. It has three key benefits… In winter the pot stays warmer longer, the roots have free run to grow rapidly and re-potting is a lot easier..and cleaner.

This Taxus has been three years in a feed bucket, it was root trimmed and put back in the same Bucket with new soil and Polystyrene chips in the bottom… as much more growth on the top is required.

I use this technique on Taxus, Prunus and Crateagus. I would NOT recommend Pine and Spruce.


Polystyrene in pots 2
Polystyrene in pots

Polystyrene in pots 3

Bonsai Potter showcase #9 Bryan Albright Video

Bryan is one of the most established artists of the Bonsai potter circuit his pots are famous worldwide and are used by many of the best bonsai artists to enhance their work.

I met Bryan at the first Ginkgo Award in Belgium way back in 1997 and I have many of my exhibition trees in his pots. Bryan has the uncanny ability to create ultra simple understated pots that bring out the best in ones trees.

A bonsai artist in his own right Bryan and is the winner of the Noelanders Trophy VI, his understanding of matching the correct pot to the tree is an asset to any artist.

In this video Bryan talks about how he creates is iconic Nanban pots, and the influences old Japanese pottery has on his work.

The majority of Bryan’s work is by commission he does hold stock and it is available from his extensive website.